Pages

Monday, June 27, 2011

focaccia


I did some bread posts already so this one won't be as thorough. I made a couple of batches of focaccia lately so I just wanted to share. It really doesn't take that much effort, its totally fine to knead this bread in the stand mixer. The dough is wetter then that of regular bread. It's actually very close to a pizza dough with extra oil and salt. I used unbleached bread flour, but regular all purpose is fine. I haven't made any whole wheat versions. Usually I am a firm believer in adding at least a third of whole flours, be it wheat or spelt or something else. In my head focaccia needs to me really light and fluffy.


I did notice that the bread goes stale quite fast, so from now on ill stick to serving it at dinner parties with 4 guests and more so it's gone by the end of the night. Serve it warm, but not hot. That's another bread rule being broken. 


The dough has a single rising period in a bowl coated in oil and covered with a towel. Then it gets shaped into a rectangle to fit the baking sheet and gets another 30 minutes of rising, this time uncovered, while the oven is being preheated as hot as possible. 


When you are ready to bake, poke holes all over using your fingers. Drizzle with olive oil, sprinkle with coarse salt and chopped rosemary. Of course you are free to add whatever you like, but at some point you have to call it pizza. I added some chopped basil, in line with the idea of emptying out the kitchen. 


Ingredients: 
4 cups of flour
1 1/2 tsp of instant yeast
2 tsp salt
1 1/3 cups warm water (maybe more)
1 tsp olive oil for in the dough, plus extra for topping.

Directions:
Mix the dry ingredients in the stand mixer, slowly add the water, when combined add the oil. If the dough looks tough and dry, add more water. Kneed on low speed for 10 minutes. 

Shape into a ball, coat with olive oil and let rise until doubled in size, covered with a towel or plastic bag. 

Prepare a baking sheet with olive oil, turn the dough out onto the baking sheet and shape it to fit into the corners. let rest for 30 minutes while heating up the oven to 500-550F. 

Poke holes all over and top with oil, salt and rosemary, ... . Throw a couple of ice cubes on the bottom of the oven, this will create a nice humid environment. Bake for 20 minutes at 500F. Turn the heat down to 400F and bake another 20 minutes.

References:
The river cottage bread handbook by Daniel Stevens

Saturday, June 25, 2011

Blueberry Pie


I have some pretty big news to share; I decided to move back to Belgium. When exactly I will be moving out of the country hasn't been decided. My guess is any time between the end of summer and the end of the year. I do know I'm moving out of my current apartment by the end of august. I guess I will mostly be blogging about cleaning out cabinets for the next two months. The months after that probably mostly about "nomadic cooking" in other people's kitchens. Eventually I hope to focus my blog on building a solid pantry completely in line with the idea of cooking from scratch. I hope to share with you some of my local finds and "un-finds". I have to admit it scares me a little to be cut off from the endless availability New York has to offer. On the other hand, I am sure I will come to love other opportunities local communities have to offer, like going directly to the farm. 


 The first thing I am using up today is an over-sized tub of blueberries. And what better way to use them then in an all American desert. An early goodbye ode.


I looked up a couple of different recipes for blueberry pie. You would think that putting blueberries and sugar between two layers of crust about describes the idea, but I have made some bad pie crusts and I was determined to get to the bottom of good crust making. The two dangers are a dry crust or a tough crust. Basically they are both caused by wrong amounts of water. Using the correct amount of water is tricky however as it depends on your flour and on the weather. I found the solution on the website from "America's test kitchen". Using half water and half vodka. The vodka, allows you to add "too much" liquid at the beginning to make a wet workable dough, but vodka evaporates quickly and doesn't allow the gluten to develop during baking thus preventing a tough crust. 


Another thing I took away from their recipe is using both butter and shortening. That was said to give it the flaky texture caused by shortening and the flavor added by the butter. If you ask me, there is really no reason to use shortening unless you are dairy intolerant. Butter should make it just as flakey. The idea is to eat as wholesome as possible. I know I cant make shortening at home but I can make butter, so that's exactly what I did. I made butter and used it in addition to the shortening that I am trying to use up anyway.  


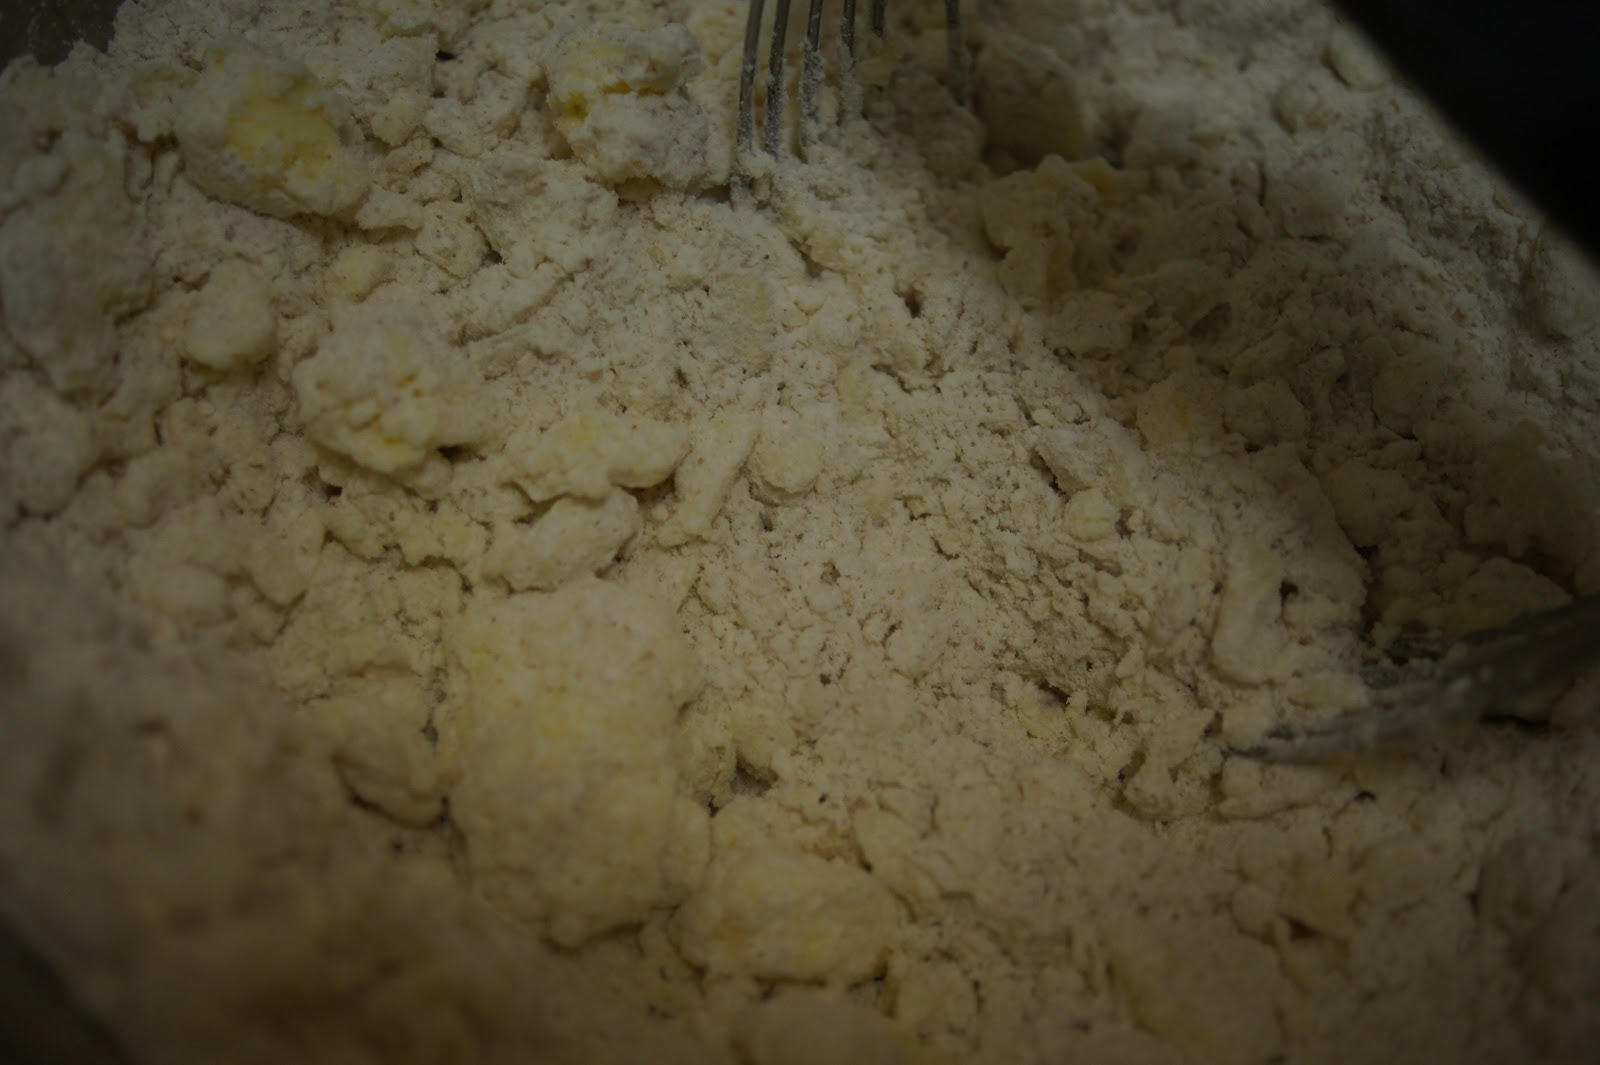
Most recipes call for a food processor. They tell you how many times you need to pulse the mixture to make sure its not over blended, ...

I like to do this by hand. The dough blender that you can see in the picture does a really good job. It cuts the fat into the flour and leaves a grainy, sandy texture. If you are worried about over processing the dough, start with two thirds of the flour and cut in all the fat, then stir in the other third of flour. That way you are guaranteed to have some uncoated flour in there to help you with the layers you are trying to form which will result in a flaky crust.


Another problem with fruit pies is the water that comes out of the fruit. Most recipes call for starch as a binding agent. Of course then there is the risk of having a thick solid pie. If you use jam making tricks like natural fruit pectin with sugar, you don't need to use that much starch.  Apple and citrus have high levels of pectin. I used grated apple, lime juice and lime zest. Just because that's what I had at the house.


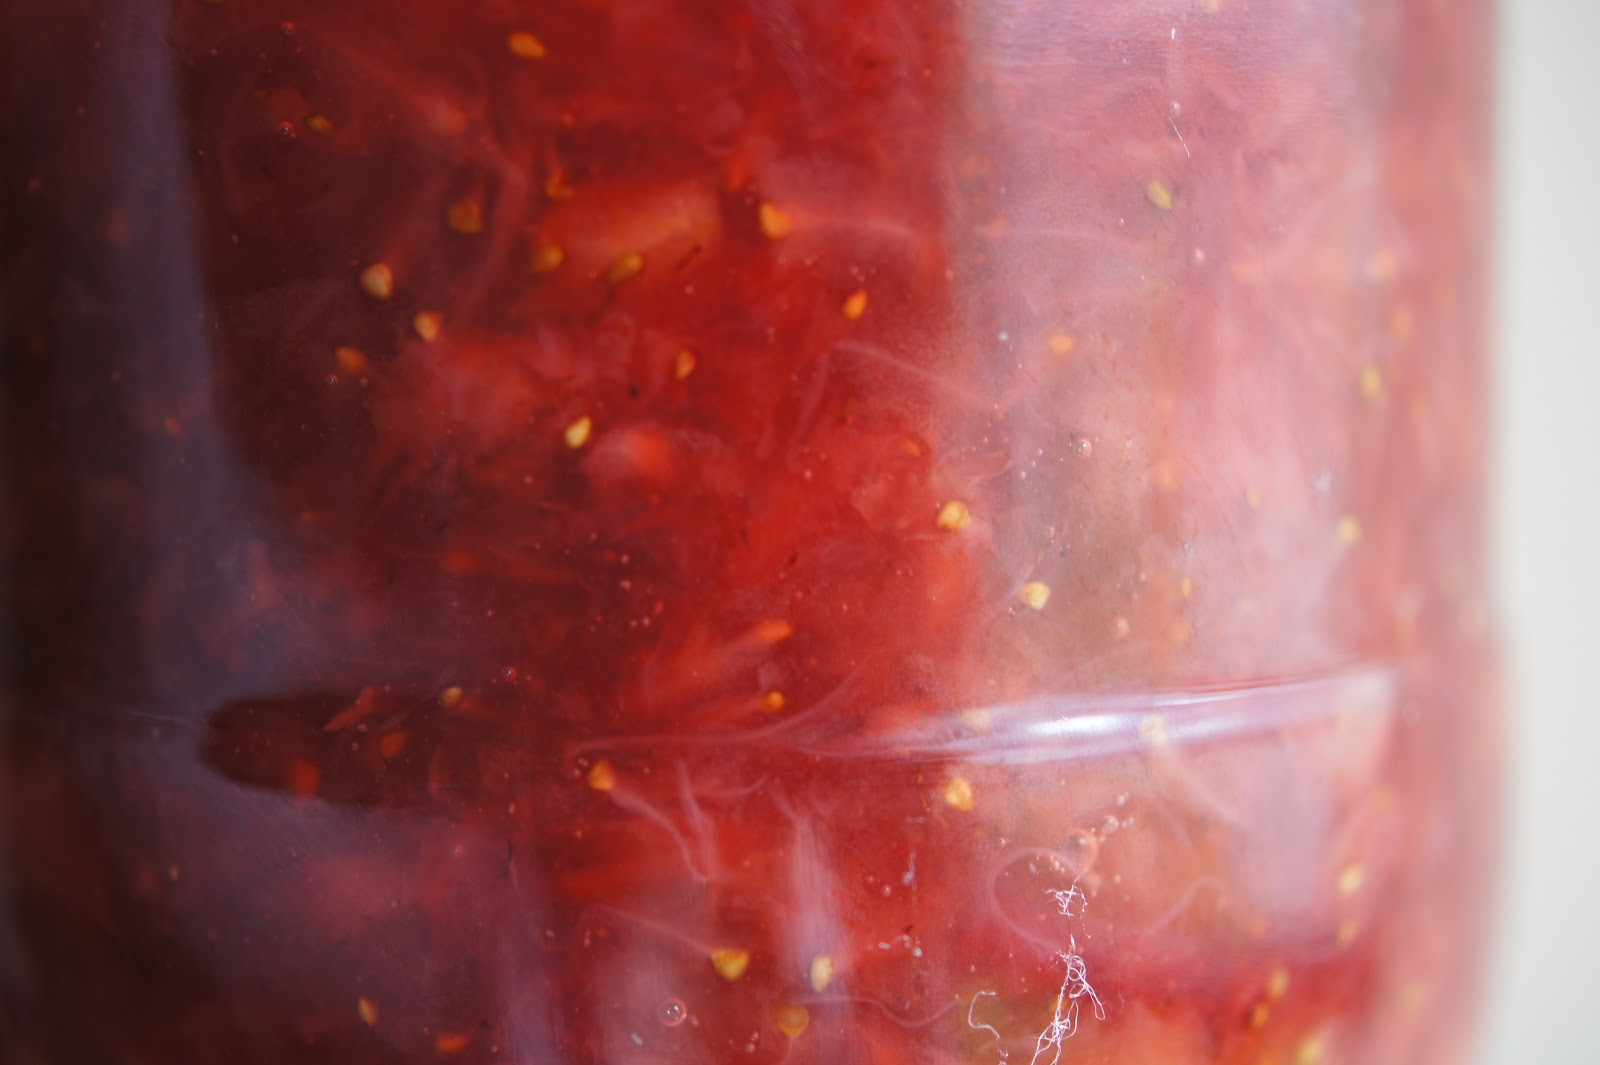
I put half the blueberries in a saucepan, mashed them with a potato masher and started to make some jam. Then, after it had cooled for a little bit I added the apple, lime juice and lime zest, sugar and starch. I am sure these could have been added in the pot, but I was worried of over activating the pectin as it still had to go into the oven for about an hour. I made the right decision because it came out solid enough.


Another thing I have sitting in the cabinets is matzo meal. I haven't gotten around to using it up. It works great as a starch to absorb some liquid from the pie, so that's what I used.


For rolling out the dough, make sure it is chilled, all recipe books tell you this, and its worth it. It really works. Another thing that works great it rolling it in wax paper, it peels right off. I measured the width of the paper and knew that a round exactly to the edge would be 12' in diameter. Perfect for a 9' pie dish. 


Make some hols in the top layer, however you like to. It really doesn't matter, its just to let the steam escape. Let esthetics be your guide. Make sure you get rid of the excess dough around the edge. Leave about 1/2' to cramp the edges together.  


I realized I had extra lime juice, lime zest, vodka and sugar. Voila, a shot was born. I did melt the sugar first in some hot water to make a simple syrup.


Ingredients: 
2 1/2 cups of flour
1 tsp salt
1 tbsp sugar
1 1/2 Cup (6oz) chilled cubed butter
1/2 Cup (2oz) vegetable shortening (or butter)
1/4 Cup cold water
1/4 cup vodka
1 egg, beaten with a tbsp of water

5 to 6 Cup of blueberries
2 tsp lime or lemon zest
2 tsp lime or lemon juice
1 grated apple (squeeze the juice out)
3/4 Cup raw sugar
2 tbsp Matzo meal (or another starch)

Directions:
For the crust: Mix 2/3 of the flour with the salt and the sugar. Cut in the fat in 3 additions. gently mix in the rest of the flour using a spatula. Add the water ad the vodka and mix until the dough comes together. Make to disks, one a bit larger then the other and refrigerate for one hour.

Take the disks out and roll them into 11' and 12' rounds between 2 sheets of wax paper or parchment paper. If it becomes too soft ans sticky, put it in the freezer for one or two minutes. The larger round goes in the pie pan and becomes the bottom crust. Make sure it is nicely tucked into the corners. The top round needs to be pierced with air holes before it is put on the pie and the edges are crimped. 

For the filling: put 3 cups of blueberries in a heavy bottomed sauce pan. Mash them with a potato masher and let them cook on medium heat for about 10 minutes until nice and thick. You will see both large and small air bubbles come to the surface. Take of the heat and let the mixture cool down. 

Mix the rest of the berries with the "jam", the grated apple, lime juice, lime zest, sugar and matzo meal, and put it all into the prepared bottom pie shell. Close the pie, cut and crimp the edges. Brush the top crust with the egg mixture. Bake in a preheated oven on 400F for 30 minutes. Turn the heat down to 350F, bake for another 30-40 minutes or until ready. The blueberry jam will start to bubble a little bit out of the holes, that's when you know it is ready.

Thursday, June 9, 2011

Strawberry Jam


I recently became interested in canning. No doubt something that most of our grandmothers knew how to do but somehow the baby boomers thought the store bought stuff was good enough. I made some strawberry jam a couple of days ago and I didn't get around to canning it. It's too tasty and I am sure it wont last a week.  


It takes time to learn how to live with the seasons. At least 1 year until all the seasons passed the review. And if you don't watch out those few weeks that your favorite produce is in peek season might slip by unnoticed. I have been waiting for strawberry time and I am very excited to see it is here. Ill just have to make sure that I make some larger batches of jam to get through the winter.


In jam and jelly making what happens is that the pectin in the fruit works together with the sugar and the acidity to form a gel when the mixture is left to cool. Some fruits are low in pectin, strawberry being one of them. The solution is to add pectin derived from another fruit. You can buy a processed pectin in the store, but I really don't see the point since lemon peel is packed with it. Add the peel, including the pith, of half a lemon for every 4 cups of strawberries. Some people add the juice of half a lemon or some apple instead, but that will obviously change the flavor. The lemon peel can be fished out before the jam is jarred. 


Some recipes call for normal granulated sugar, others for dusting sugar. I am not a big fan of either. I like to use raw, unrefined sugar. If I need it finer I just pulverize it in the mortar. You can even make dusting sugar this way, it will just be slightly darker in color, which I certainly don't have a problem with.

Mix the strawberries, lemon peel and sugar in a heavy bottomed, enameled dutch oven. When working with fruits it is best to use a non reactive pot. When using a metal pot, the acids will interact with the metal and actually alter the flavor. let the mixture sit for about two hours. The sugar will start to work the strawberries, this will enhance the flavor, and create more complexities then if you just start cooking them right away.


After the strawberries have been allowed to sit, give them a quick mash with a potato masher. Here you have the option to control the consistency you prefer. Whole berries, chunky, fine. I went for chunky.


Turn the heat on medium heat, stir every minute or so and let it reduce for about 10 minutes. You will see small bubbles indicating a simmer. A rolling boil means you need to turn the heat down. No bubbles means you need to turn the heat up.


After about 10 minutes, you will see the juice is becoming thicker. It should be thick enough to coat the back of a spoon. When the jam cools down it will actually get a lot thicker, so don't overdo it here.


For a small batch like this you will need 4 cups of quartered strawberries, peel of half a lemon and 3/4 cup of fine sugar.

References:
The lost art of real cooking
bon appetit june issue
river cottage preserves handbook

Wednesday, June 8, 2011

Peanut Butter

 
If someone gave me a thousand empty jars, I bet I would fill them. Even though I live in a small New York apartment with the typical New York kitchen. I only have myself and one other person to feed, I still run out of jars.


Peanut butter is made out of toasted peanuts. Toasting them yourself is no big deal. A dry cake dish will do. Toast them for 6-8 minutes on 350F moving them around every couple of minutes. When buying peanuts, make sure they are not seasoned. They should preferably be raw. I got a bag of dry toasted peanuts in the shell, so I had to skip the toasting process. 


 Give your peanuts a quick rinse and put them in the food processor. For each cup of nuts put a pinch of salt and about a tablespoon of oil. Peanut oil if you have it. Sunflower oil will do the trick as well.


Start the food processor on medium speed and work your way up. Check from time to time if you need to scrape the sides of the bowl. The paste will get creamier and softer. To get a really smooth paste you'll need about 10 minutes. 


No preservatives are used, so you should keep your homemade peanut butter in the fridge and use it within a couple of weeks.

Saturday, June 4, 2011

Carrot Soup

It has been too long since I made carrot soup. I think it is the perfect soup. It is easy to make and versatile. There are many possibilities for variations so you have the option to get rid of some things that need to be eaten. Today I noticed that I had some cilantro that shouldn't go another day and a half used can of coconut milk. 
   

The trick to most soups is to start with an onion and some good olive oil or butter. Use a heavy bottomed pot on very low heat. I turn on the pot with the oil in it when I am cutting the onion. It helps me resist to turn the heat up and the pot is being warmed through gradually and evenly. When throwing in the onion stir it around to make sure that the onions are well coated in oil and let them cook slowly. If they get color in less then 5 minutes, the heat was too high. They should be cooked for about 10 minutes in low heat until translucent. Again, to stop myself from turning up the heat, I use this time to chop the carrots. 


The carrots should be sauteed in the oil with the onions until they start to get tender. That releases more flavor than when they get added to the broth. When it is time to add the stock, throw in all other solids you plan to use. In my case the ginger, I used a cheese cloth pouch to put my ginger in, so I could fish it out later. If you are adding fresh soft herbs like cilantro add them in the last 10 minutes. When seasoning with Salt and pepper always think about the broth you are using. Taste first, take a spoonful, add some salt to the spoon and taste to see if it needs more.

I like to blend my soups, its just a personal preference. If you intend to do the same you have the option of using water instead of stock as the flavor of the vegetables will be stronger.


About the stock. I used chicken stock. I always have pint sized jars in the freezer. If you are buying chicken stock, please stop. The home made stuff is soooo much better. Ill do a post on that soon.


A basic carrot soup doesnt need anything more then oil, onion carrots, stock or water, salt and pepper. But you can never go wrong with some fresh ginger, chervil, tarragon, chili peppers, sour cream, orange, garlic, curry, coconut milk, cinnamon, honey or mint.


I try not to cling to exact amounts that much. I admit in baking it can be essential, but it not for carrot soup. 

I used about

1/4 olive oil
1 onion
4 large carrots
4 Cups of chicken stock
1/2 can of coconut milk
1/4 cilantro
salt and pepper
 

Friday, June 3, 2011

Chocolate Spread

With my last two posts focusing on bread, you might start to get how much I love bread. I crave bread every day. Sometimes I like to eat a savory sandwich but most of the time I like to eat something sweet. My absolute favorite is chocolate spread. I used to buy jars of nutella, then I started looking for verities with a decent grade of chocolate and less junk in them like preservatives. But then I noticed that it is one of the easiest things to make. Basically you just need to melt some chocolate in a bowl over boiling water, add butter and let it melt in there. Take it of the heat and stir in some hazelnut butter. 

By doing it yourself you have the utmost control over the ingredients. For my friend who is lactose intolerant I have made versions with coconut oil and almond butter. This time I used vegetable shortening, which I have to admit I am not a big fan of, since I read about how it is made, but I'm also not a big fan of throwing tings in the garbage, so here you go. 

There are also a lot of different nut butters you can use, look for one that has nothing but nuts and oil. There are too many verities that use emulsifiers and preservatives. Or you can make your own nut butter, I will do a post on that soon. 

The only tricky part is to get the ratios right so when it cools down it will solidify just enough to have a nice spreadable consistency. I got the ratios out of a very cute little book called the basics

Ingredients:

10 oz bittersweet chocolate

1 Cup and 4 tablespoons of butter (if you are using shortening add 2 tablespoons of water)

1 lb of Nut butter. Here I used a nut butter a fellow blogger received as a gift: Honey roasted cashew butter. Since I used a dark chocolate, the honey gives it some extra sweetness. 

Sugar, if you decide to use it, let it melt with the chocolate and don't use more then 1/3 cup. 

a pinch of salt


Wednesday, June 1, 2011

Pita Bread

If the traditional loaf seams a bit too daunting and time consuming, pita bread is a lot easier and faster to make. you could be eating pita bread 2 hours after you first thought of making it. It keeps in the fridge or in the freezer and if it does go stale, you an still make pita chips. In my opinion pita bread from the store really is NOT worth it compared to the home made version. 

I shared my pita bread with a friend, we had it with falafel, tabuli salad and tahini sauce. All recipes you can make from scratch. If you would like to see some videos on those recipes, go to dedemed

For the amounts the standard ratio applies. 100 units flour, 60 unites water, 2 unites salt and 1 unit yeast. These ratios are based upon weight and must be adjusted if you are using unites by volume. 

In a bowl, mix 3 cups of flour (I used half all purpose and half whole wheat) with 2 teaspoons of salt and make a well in the middle. 

In a cup, mix a tablespoon of yeast with a tablespoon of honey and about half a cup of warm water. The honey will activate the yeast and after about 10-15 minutes a big layer of foam will form on the water. 


Using a spoon start working in some water mixture into the flour mixture by pouring some in the well and making circular motions with the spoon on the edge of the well. The total amount of water needed is about 1 1/2 cups, I used a half cup already for activating the yeast, so one more cup needs to be added. Use warm water, cold water will slow the yeast down, and hot water will kill the yeast.

The people who read the traditional bread post will notice that I added the flour to  the water there and here we are adding the water to the flour. I just wanted to point out that these are just different ways of mixing the dough. There are a number of ways additional to these two. I think it just comes down to using the methods you are most comfortable with. 

Once the flour is totally worked in you will have a dough that's too sticky to shape into a ball. You can leave the dough in the mixing bowl, cover it with a towel and let it rise until doubled in size. The weather has been very warm the last couple of days, so 30 minutes of rising was enough for me. If you do this in the winter, try to find a warm spot in the house. Some people like to preheat the oven to 100F then turn of the heat and let the dough rise inside. 


When the dough has doubled in size, turn it out onto a well floured work surface and knead for about ten minutes. I was fortunate to have a friend over to share the pita bread with me and help out with the picture taking. I hope these pictures capture some of the steps in kneading, which is something that was very difficult to do for the traditional bread post as I was alone. There are a lot of verities of techniques in kneading, but the principle stays the same; the dough needs to be stretched, folded and turned to develop the gluten. 

You know you are done kneading when the dough becomes silky and you are able to stretch a piece of dough without braking it. With white flour, you can go even further, and stretch it so thin that light will come through.


If you worked with a batch of about 3 cups of flour, you should get about 8 pita breads out of it. Divide the dough in 8 almost equal pieces, deflate them with your finger tips and shape them in balls. The same rules apply here as with the regular bread, you want to fold the edges in, pinch to close the seams and stretch the surface to create some tension. Cover the balls in a cotton towel and let them proof (rise) for about 15 minutes. In the mean time you'll want to preheat the oven to 500F, preferably with a baking stone inside.


Roll the pitas out very thin and plop them on your baking stone without opening the oven door for too long. They only need a couple of minutes, they dont need to be flipped, and you know when they are done, when they have had the chance to balloon up for about 30 seconds.